AnoeskaB's Blog
How to build pyramids
(Repost of sep 20, 2008)
To make the pyramid walls go down for easy playing, you need to use a special (but easy) way of building. First of all, you need ofcourse the Pyramid build set, but also the invisible windows and doors (http://www.thesimsresource.com/downloads/sims2/sets/objects/526475/)
Important: Make sure you have the (residential and/or community) collectionfiles of the pyramid walls. You will not find the pyramid walls in the normal catalogue, only in the collection files!
The reason for this, is to not clog up peoples already full catalogues with something that is not very often used.
The technique used for the pyramids is basicly the same as for building the lighthouse.
1 Make a square with the normal walls. The size depends on how large you want to make the pyramid (15x15, 11x11, 9x9, 7x7 or 5x5).
2 Place the pyramid meshes against the inside of the normal wall.
3 Use a pyramid wall with door opening on one of the sides.
4 Use the invisible door to give sims access to the inside of the pyramid.
5 Use the invisible window to hide all normal walls.
6 Use the invisible fence to prevent sims from sticking their head through the pyramid walls, by adding the fence on the inside of the pyramid, 1 tile from the walls. The invisible fence is not part of the collection file, you will find it in the normal fence catalogue. Note: in the picture an ingame fence is used to show how to place the fence. The real invisible fence is invisible (duh ;) ).
The pyramid walls and invisible door/window/fences are TSRAA and may be included in lots here on TSR.
Have fun building your pyramids!
Free Set
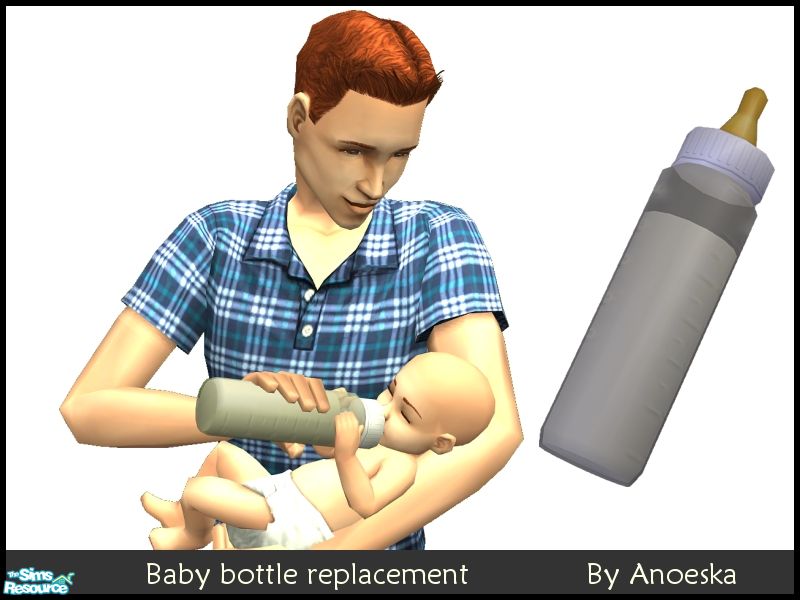
The free set from 15 januari - 12 februari is the Baby Bottle Replacement. No more green stuff for your baby's and toddlers, you can give them some real milk now!

Have fun with it!
retro diningchair updated
A small update on the retro diningchair: the legs have been made recolorable. Link: http://www.thesimsresource.com/downloads/sims2/objects/furnishing/seating/diningchairs/744573/Preview Ankara Livingroom
My next set will be the Ankara Livingroom, made in the same style as the Ankara Diningroom. I still have some things I want to add to this set, but here's a preview of the set so far.
Deco objects for the new set
I've made a few deco objects for my new set. Here's a preview of two of them. There are also a few smaller ones in the same style.
New set comming up!
I'm working on a new set. It's not ready yet, but I'll show you a preview of it, so you can see a little bit of it already. It's the first of a series I'm planning to do in this style. (Yes, also the kitchen I promissed a loooooong time ago.) If all goes well, in the end you will be able to furnish your sims houses completely in this style. It's made in a style I like: simple, modern and stylish. The screen/cabinet you see on the left is decorated on both sides, making it a very good object to seperate the diningroom area from the livingroom area. Ofcourse it will have plenty of slots, so you can all place your favorite deco-items in it, and give the room your own touch. I think I'll make a few deco-objects for this set as well. Some candles and maybe something else. And curtains in diffent lenghts is also in the planning. Anyway, I hope you all like it.
How to build the Lighthouse
To build the lighthouse you need the Lighthouse Build set and the Invisible window and door set. Don't forget the collection files! The meshes will not clog up your catalogs with stuff that is not used very often. They will only appear in the collection files. 1. Make sure you have a flat piece of ground of at least 7x7. Build with normal walls a shape like in this picture. 2. Place the round wall segments agains the walls. You place them on the inside, they show up on the outside. You can use either the normal ones or the one with windows in it.
 3. Place the wall segment with the door opening.
 4. Use the invisble window on all maxis walls (except for the dooropening), so they will "disappear".
 5. Place the door with the arrow pointing to the outside of the lighthouse.
 6. Fill the floortiles inside the maxis walls.
 7. Use the "floor ring" to cover up the unfilled floortiles.
 8. Repeat these steps for as many levels as you want your lighthouse to have. For higher levels you may need to first place the floor tiles before placing the wall segments.
 9. On the top level you can place the spinning light (needs Nightlife). You might need to use moveobjects on to place it.
 10. Place the top part at the top.
 11. Your lighthouse is ready! You still need to place the stairs. For that you can use the modulair stairs, in combination with a foundation (use the lower floor ring if you have a foundation part in the middle). Or you can use some custom stairs. Spaik made some fantastic 3-tile stairs, which will fit in perfectly in the Lighthouse.

Nautical
I've created something for the Nautical/Marine Theme: a boat where sims can really sit in, including a version that can be used on lots with neighborhood water (ocean lots). And also some build material to build your own lighthouse with round walls. Yes, round walls! The walls will go down with the normal walls, so you can see your sims inside the building and see them climb their way up to the top, where they can freely walk around. Including also a lighthouse light, that spins around. I still need to finish a few details for these creations, so they will be published at the end of the week, probably thursday or friday.


Update
The whole "Shop till you drop" set is published now and the set has became larger then I had in mind when I started working on this set. For everyone who doesn't have this set yet, there is a Superset comming out on tuesday, with an easy download of all sets in one. The complete set has 30 meshes, 69 recolors and 4 collectionfiles.In case some people had problems with placing things like toddler toys or kitchen supplies on the shelves, I recommend using the placers of part 1a. With those placers you can place those kind of objects on the shelves or on other tables. So you can also use them if you for instance want some toddler toys as decoration on an endtable in a childsroom.
Next thing up will be a kitchen, but you probably had already guessed that, as my poll is about this kitchen. I'm also working on a few other things in the mean time, so I can't tell yet when the kitchen will be ready, but I promiss I'll try to make it something special.
Almost forgot: I've done a few little updates on some files: the curtain mesh of the Turano set had a bad shadow that is now removed. I also added a collection file to the Turano set.
Also the advertising painting of the "Shop till you drop" set had a wrong description. It's updated a few days after it is published.
Get ready to shop!
My newest set is almost ready and will be published in a few days. Get ready for a whole new way of designing your (OFB)shops! Modernise your shops with several new types of shelves: small, large, round and straight, wall shelves and even some counterdisplays that realy can hold objects to be sold. Included are also a new counter that matches the new shelves and some advertising displays. To fill your shop with some nice salesware (or just to decorate your houses ofcourse), I've also made a whole set decorative objects in all kinds of trendy colors. Several of them are stackable, like the cushions and baskets. They stack them in normal shops, and soon you can also stack them in your Sims shop. All objects (even the shelves) are cloned from base-game objects, so they should also work if you don't have OFB.


 Limited Time Offer
 For a limited time only, we’re giving away a free


